How to use waitlist for your event!
In order to use this feature, you must have checked the ‘’Approvals for Attendance'’ box while creating your event.
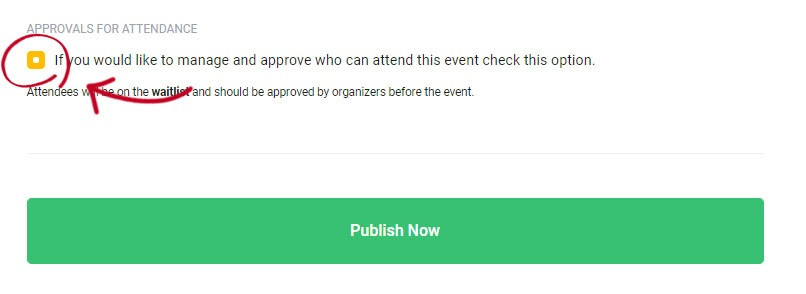
You ticked this box when opening your event, so how will you manage your RSVPs?
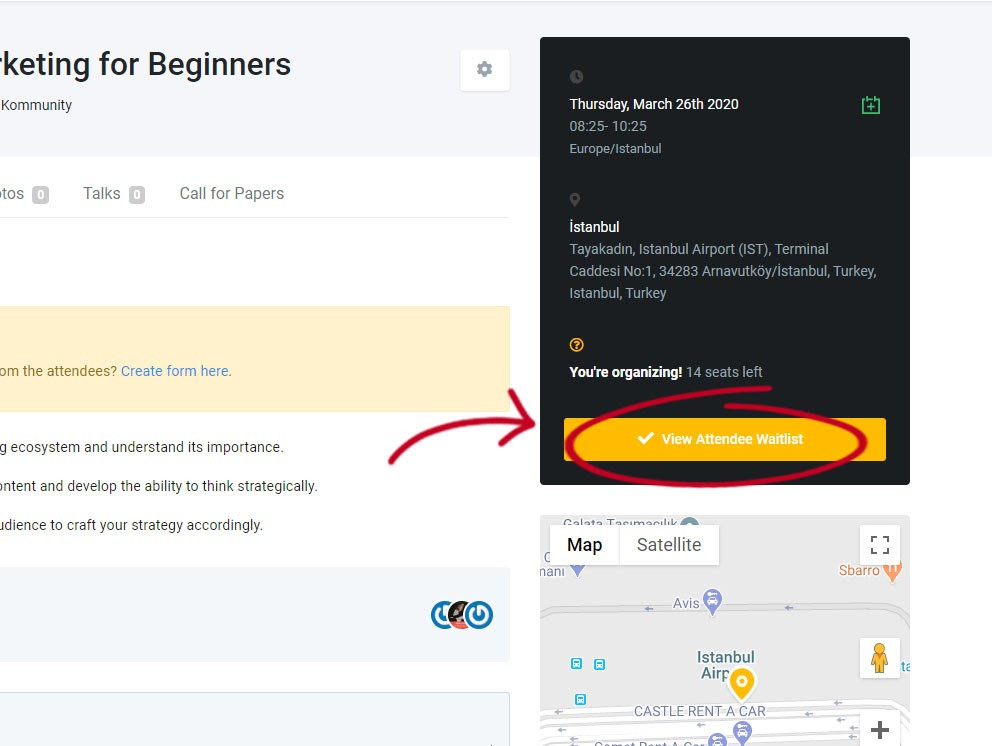
1 - Go to your event’s page and click on the ‘’ View Attendee Waitlist’’ button on the right.
2 - Here, you can see people who requested to come to your event, and you can approve their attendance. When you approve, the confirmation mail will be sent to the participant and after that he/she will be able to see information about your event, such as location.

You can also ask questions to the people who will participate in the event by creating a questions form from the event page and confirm participation in the event according to their answers. For more information about the questions and forms, we can take you to our article about "Questions".
Let's say you decided to change the participation status to " Not going";
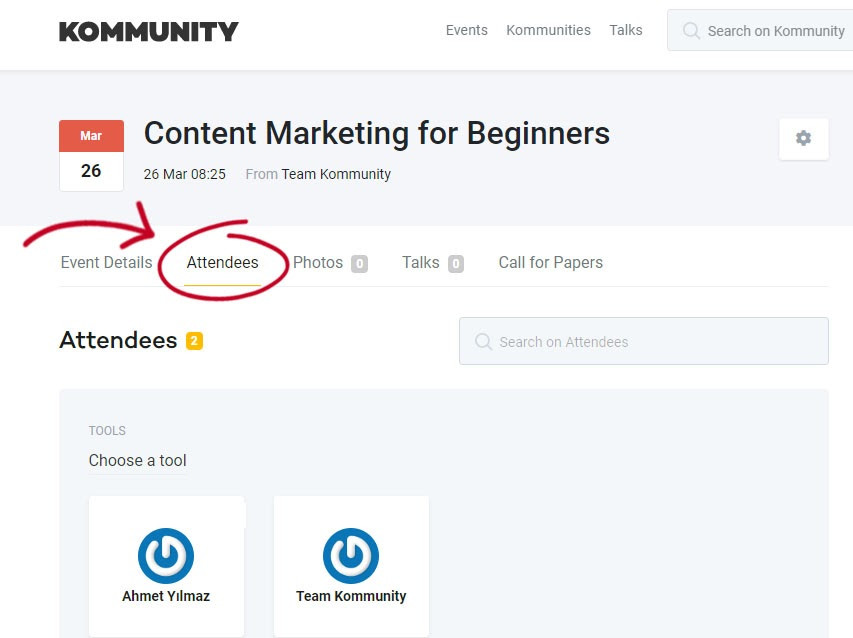
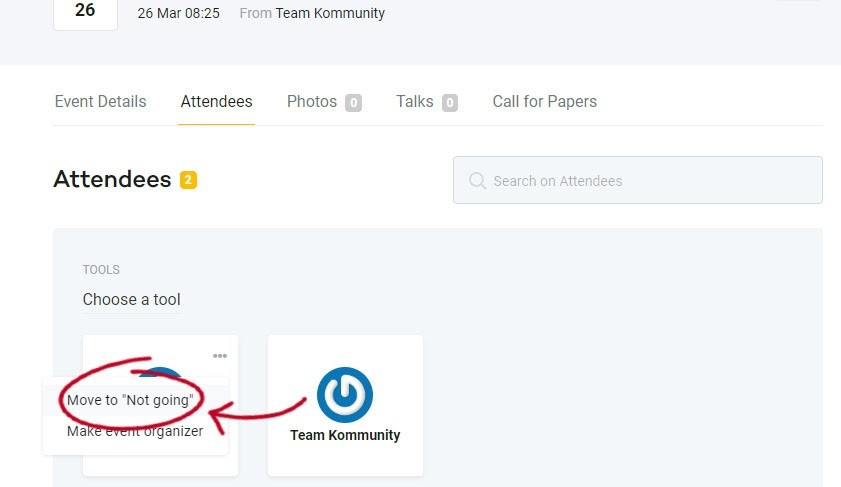
1 - Go to your event’s page
2 - Click the ‘’ Attendees’’ section next to the ‘’Event Details’’
3 - Move your mouse cursor on the person’s profile and click on the three dots that appear on the right top.
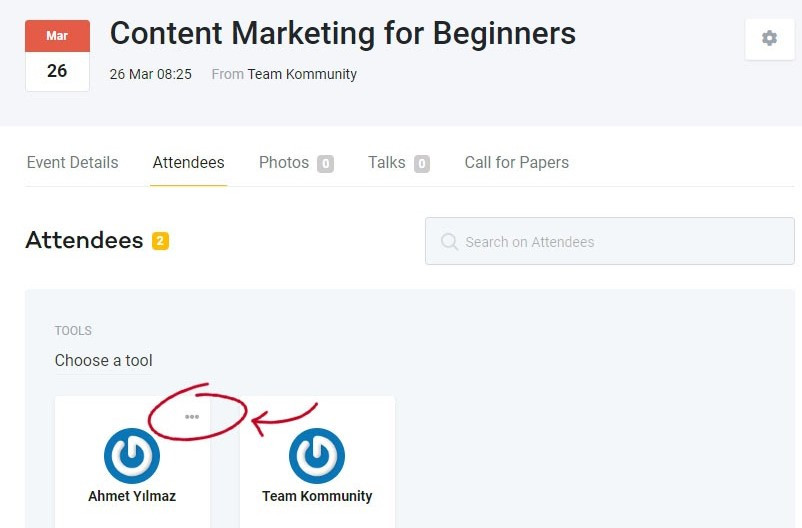
4 - Click on ‘’ Move to not going’’ to change the person’s attendance and the participant will receive an e-mail from the system stating that his participation in the event has not been approved.
It is that easy to check and control your waitlist at Kommunity.com. You don't need a lot of lists, paper or paper notes. We care about your effort and try to provide all the tools that you need for your organization process to be hassle-free!