How to create a private kommunity
With our new feature, you can now create private kommunities. Private kommunities allows you to manage who can join your kommunity and who can see your content.
1 - Click on the green ‘’Create’’ button at the top right of your homepage and choose "Create Kommunity"
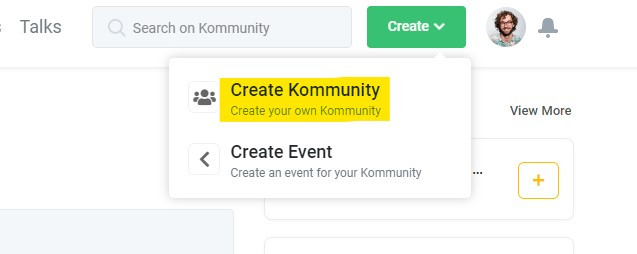
You'll be directed to the "Create Kommunity" page
2 - Fill in the basic information about your kommunity
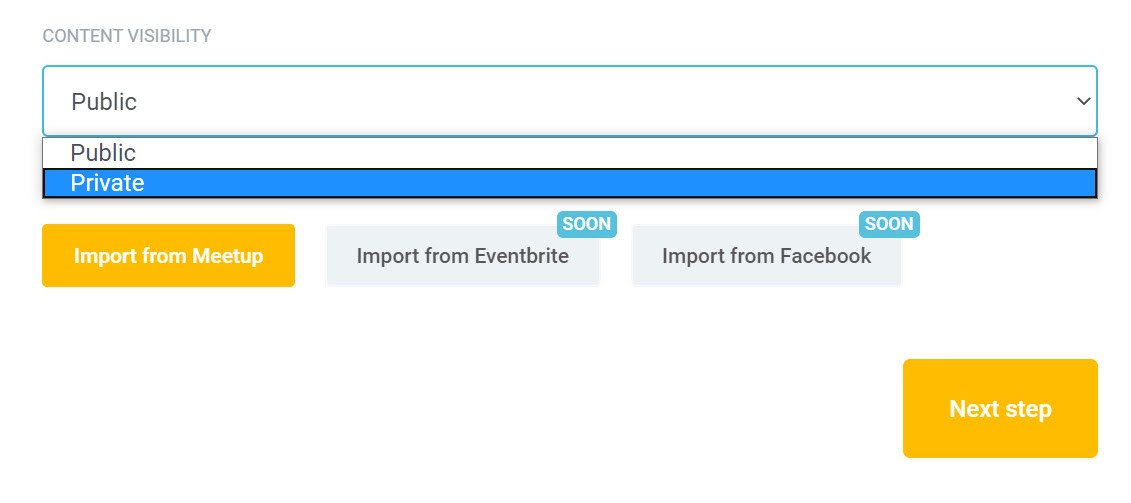
3 - Choose your content visibility. If you want to create a private kommunity, you should choose “private”
The content of the private kommunities is only visible to members who are approved by the kommunity organizer.
The content of the public kommunities is visible to everyone.
If you create a private kommunity or convert your public kommunity to be private, you can't change your kommunity to back to public.**
**The reason why we don't allow converting private kommunities to public is that we respect our users' privacy. Public and private kommunities have different visibility to non-users and search engines. A member of a private kommunity may not feel comfortable sharing their information with other parties. You can also check our privacy policy for further information.
4 - After choosing the content visibility hit “next step”
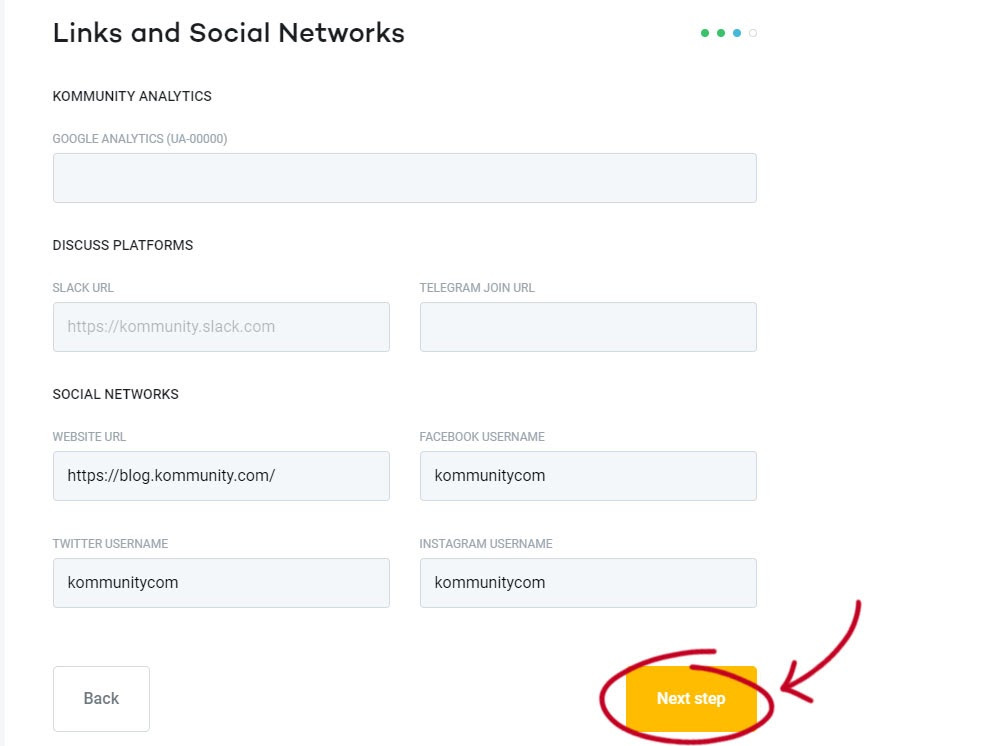
5 - Fill in your kommunity’s social media and other platform links and hit the next step
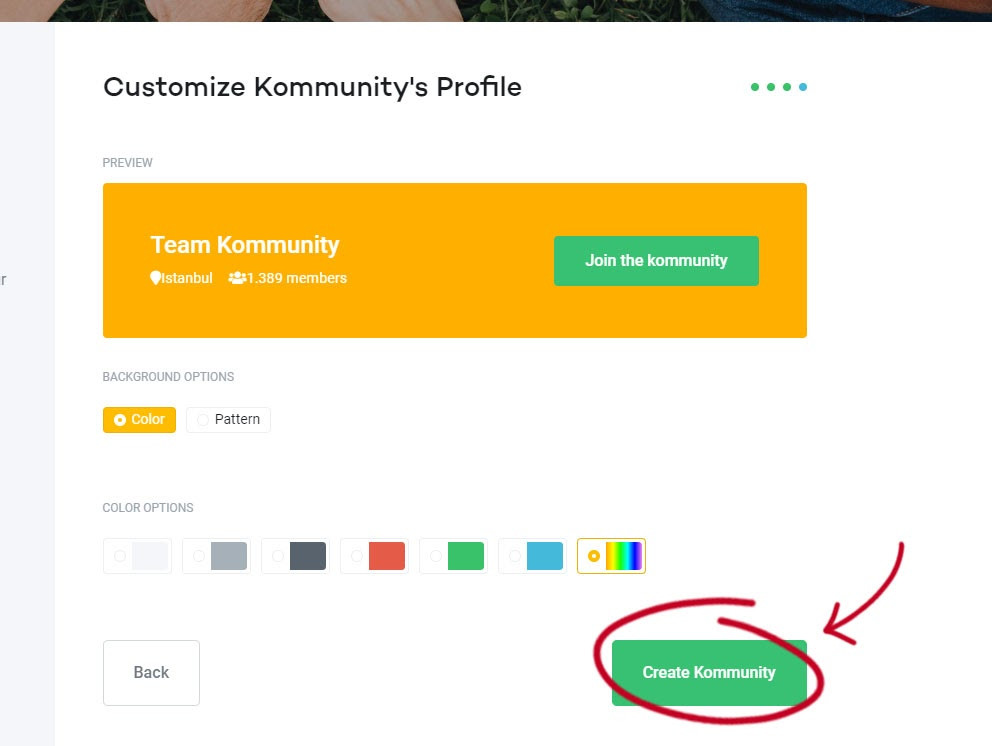
6 - You can customize your kommunity’s page, you can choose color or pattern and hit the Create Kommunity button
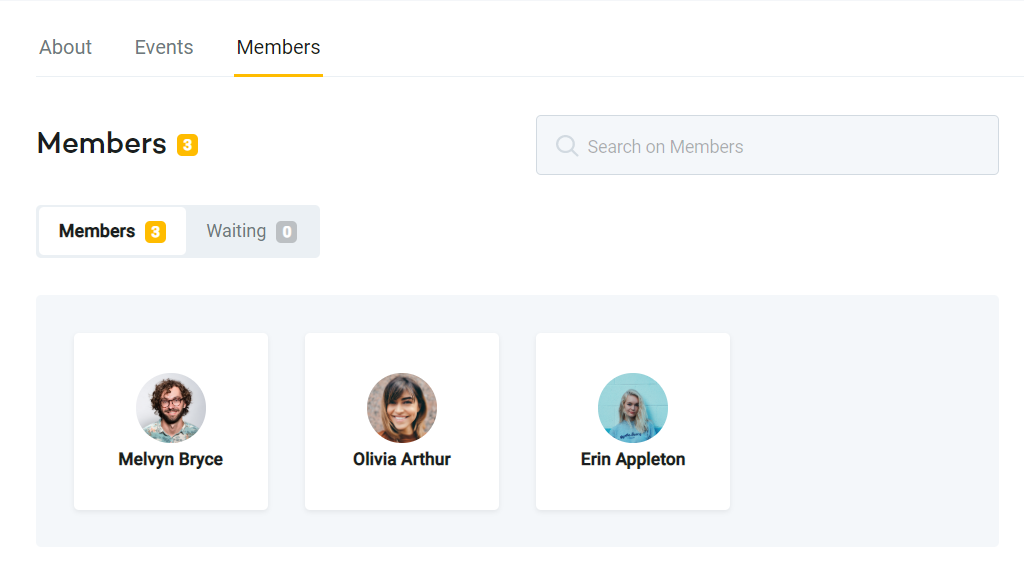
Approving members:
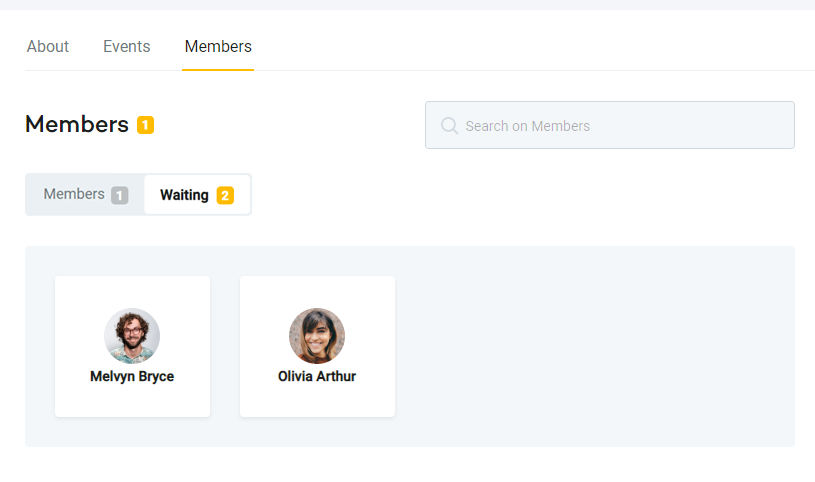
When people request to join your kommunity you can see your pending requests on your members tab on your kommunity page
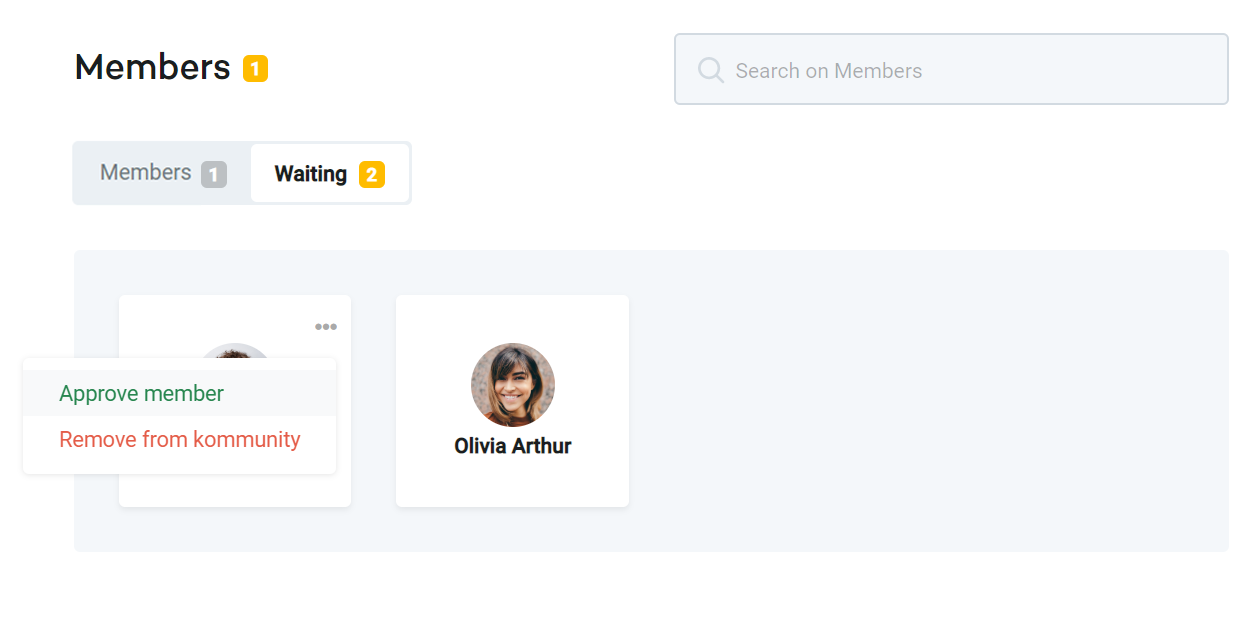
If you want to approve someone’s request:
- Move your mouse cursor on the person’s kommunity icon and click on the three dots that appear on the right top.
- Click on “Approve member”
You can always see your members or change their status on your members tab